
Want to get more out of SuiteAcademy?
Become a member and get access to:
- Workshops
- Courses
- Templates
- Monthly progress calls
Notifications are powerful alerts inside SuiteCRM, triggered by background processes like new record creation or modifications. This functionality is useful when you need to alert users immediately about important events occurring automatically within the system. Learn how to leverage the Workflow Manager to build these time-critical alerts for your team members.
- Notifications appear via a special module accessed through the top right icon.
- Utilize Workflow Actions to calculate a dynamic URL for linking back to the record.
- Configure notifications based on specific assignment rules (e.g., postal code or product range).
- The system uses the specific 'alerts' module to store and display notifications.
Why Use CRM Notifications?
SuiteCRM notifications serve as immediate alerts found in the top right corner of your system. They are useful when you need to alert users to important events that occur automatically in the system.
A common use case is lead generation. If leads are generated via a web form, you can trigger a notification based on rules like postal code or product range to immediately alert the correct sales person about the new lead assignment. This serves as an alternative or addition to sending an email.

Setting Up the Workflow Header
You must start by creating a new workflow dedicated to generating the alert.
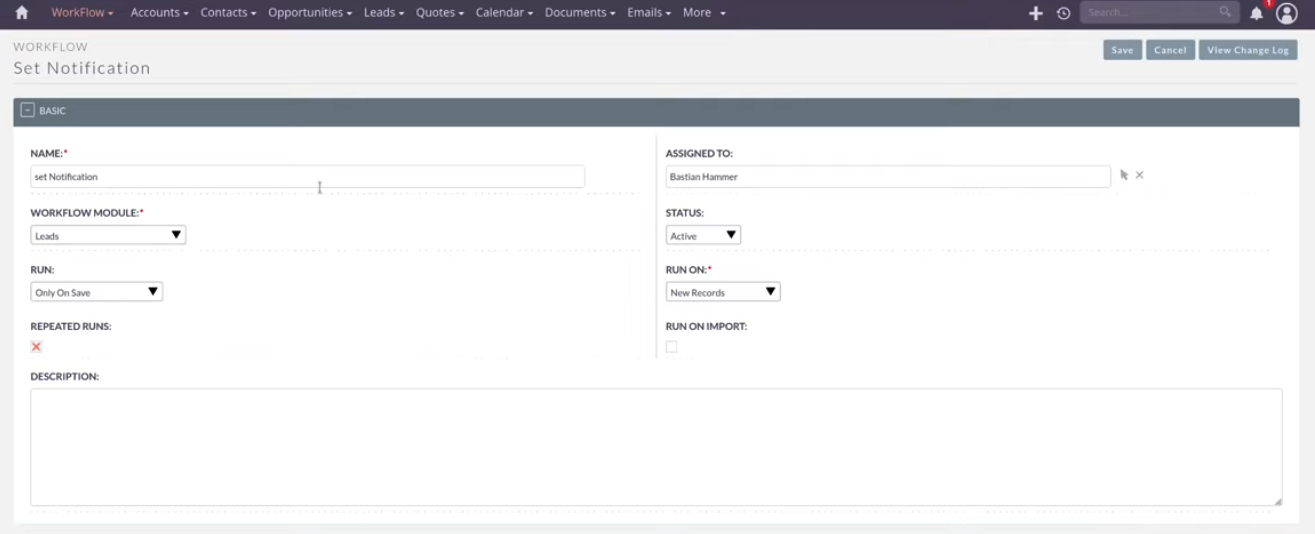
1. Name and Module
Give the workflow a name. Select the specific module you want the workflow to run on, such as Leads. This feature can be used for any module, including Contacts or Opportunities.
2. Run Settings
Set the workflow to run only on save. It is important to avoid setting repeated runs, especially if the workflow is running only on new records, because a record can only be new one time. However, you might use repeated runs if you are tracking modifications, such as every time an invoice is modified.
Caution: Do not run the workflow on import, as a large import would result in hundreds of notifications, potentially annoying your team.
3. Conditions (Optional)
You can add conditions if needed. For example, if you only want to alert your team about high-scoring leads that have gone through lead scoring, you would add a condition that checks if the lead score is above a certain value.
Calculating the Record URL
The notification's last name field is linked, allowing the user to click directly on the alert to access the record. To achieve this direct link, you first need to calculate the record's URL. This setup stems from the legacy system.
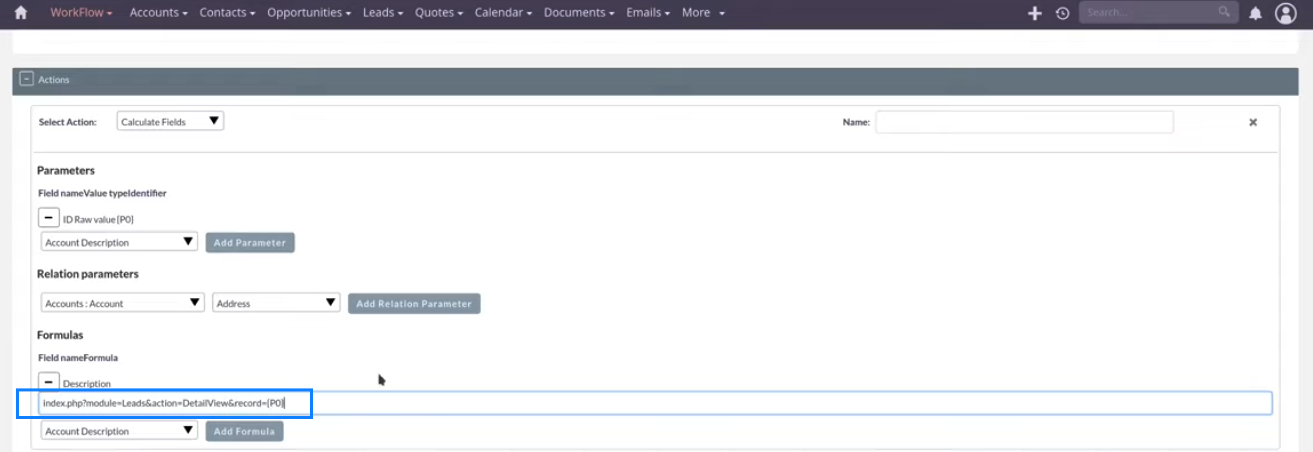
Action: Calculate Fields
Add an action using "calculate fields".
Parameters
- The first parameter required is the raw ID of the lead (or whichever module you are using).
- You must construct the complete record URL.
- Ensure you substitute [Module Name] with the correct module (e.g., Leads) and append the calculated record ID parameter at the end.
Creating the Alert Record
The next action in the workflow is to create the actual notification using a specific module.
Action: Create a Record
Add the action "create a record".
Target Module
The record needs to be created in the Alerts module. This specific module is not visible in the navigation but is used internally for the alerts/notification feature.
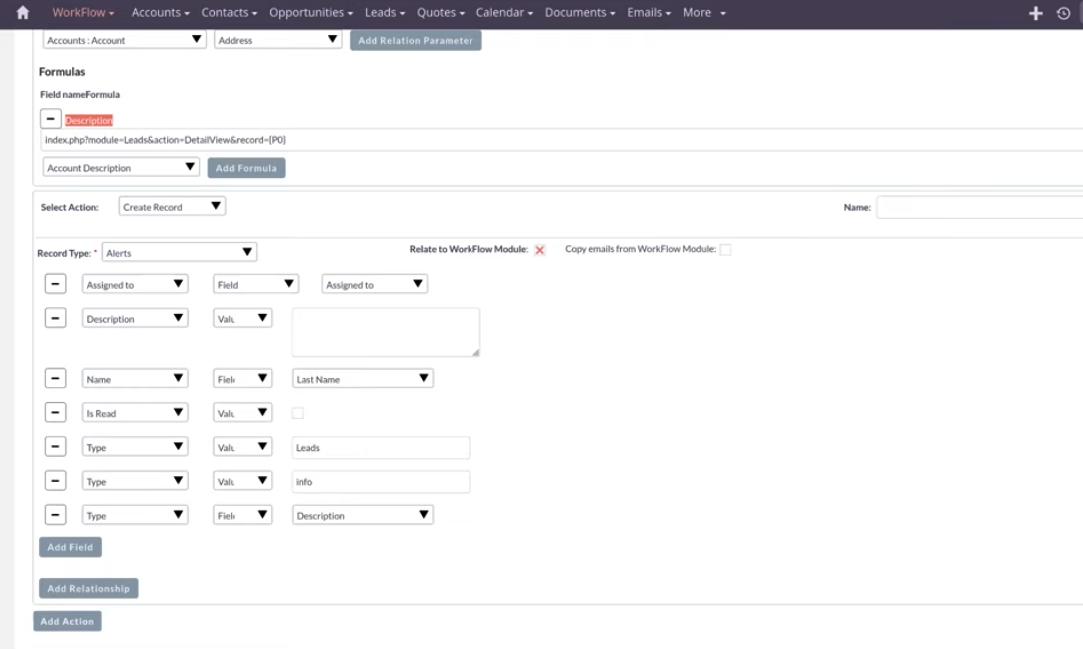
Mapping Essential Fields
You must add and map the required fields:
- Assigned To: You can set a concrete value or assign it to a field. For instance, assign it to the person currently assigned to the lead (e.g., based on postal code assignment rules).
- Name field: This is the name displayed in the notification (e.g., map this to the lead's last name). This link is what the user clicks to jump to the record.
- Is Read: This is important; it should be left empty or unchecked initially so the user sees the notification. Once the notification is dismissed, this field changes to "read".
- Description: Use the URL that was calculated in advance in Action 1.
Note on Type Fields
Due to internal issues or field naming confusion in the dropdown, you may see multiple 'Type' fields. You will typically need to map the following in order:
- Map this 'Type' field to the module (e.g., leads).
- Map this 'Type' field to info.
- Map this 'Type' field to a description field.
Results and Best Practices
Once the workflow is saved and activated, the next time a lead is created, the notification will trigger.
The notification will appear and stay until clicked. Users can then click on the lead's name to jump directly to the record or click "Dismiss All" to remove the notification.
Caution: Be mindful not to create too many notifications, as this can annoy your team members. Use notifications only for information that is time-critical or high-quality.
Conclusion and Next Steps
By utilizing the Workflow Manager, specifically the 'Calculate Fields' action to generate a dynamic URL and the 'Create Record' action targeting the hidden 'Alerts' module, you can provide instant, actionable alerts to your team. Focus on time-critical events to ensure your team remains responsive without being overwhelmed.
